






Your bag is empty
Explore timeless jewelry that carries love and inspires lasting impact.
We promise that every purchase you make gives one person access to clean, life-changing water.
Explore timeless jewelry that carries love and inspires lasting impact.
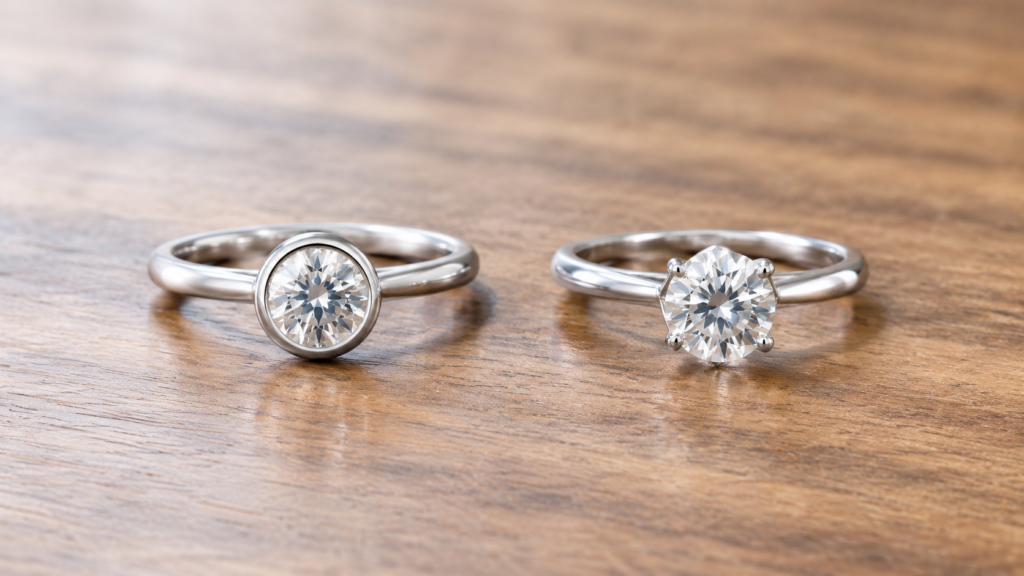
For daily wear, the bezel vs. prong tradeoff is usually coverage against visibility: a bezel covers more of the stone’s edge and creates a smoother outline with fewer catch points, and prongs leave more of the stone exposed with better access around it for cleaning. Neither label promises a secure, low-maintenance ring on its own. What matters is the finished geometry, the stone’s shape, your routine, and how much upkeep you’re comfortable with.
Look at more than the face-up view. Setting height, bezel thickness, prong placement, exposed corners, and clearance for a wedding band can make two rings in the same category feel completely different on your hand. If the ring will sit beside a straight band, compare the pair together. The side view will show whether the setting leaves enough room or pushes the band outward.
Bezel settings surround more of the stone’s edge, and prong settings hold it at several points and expose more of its outline. GIA’s engagement ring setting guide uses the same geometry-first distinction when explaining both setting types.
| Bezel setting | Prong setting |
|---|---|
| Coverage: A rim surrounds all or part of the stone’s edge. | Coverage: Narrow supports hold the stone at several points. |
| Catch points: Usually a smoother perimeter with fewer projecting tips. | Catch points: Raised tips can catch on fabric, hair, or gloves. |
| Visible stone: More metal appears around the outline. | Visible stone: More of the perimeter and side can remain open. |
| Cleaning access: Residue may collect near the rim. | Cleaning access: Open sides often provide easier access. |
| Inspection: Check for visible damage or stone movement. | Inspection: Check for worn, shifted, bent, or loose prongs. |
| Shape: Rim thickness and coverage can change how the outline reads. | Shape: Placement and prong style should protect vulnerable areas. |
| Band fit: Rim height and gallery can affect clearance. | Band fit: Head height and prong structure can affect clearance. |
This comparison describes common designs, not every finished ring. Rim height, bezel thickness, prong count, workmanship, and the setting’s overall profile can change the result. If you want to see those differences on finished designs, compare Do Amore’s engagement ring settings from both the top and side.
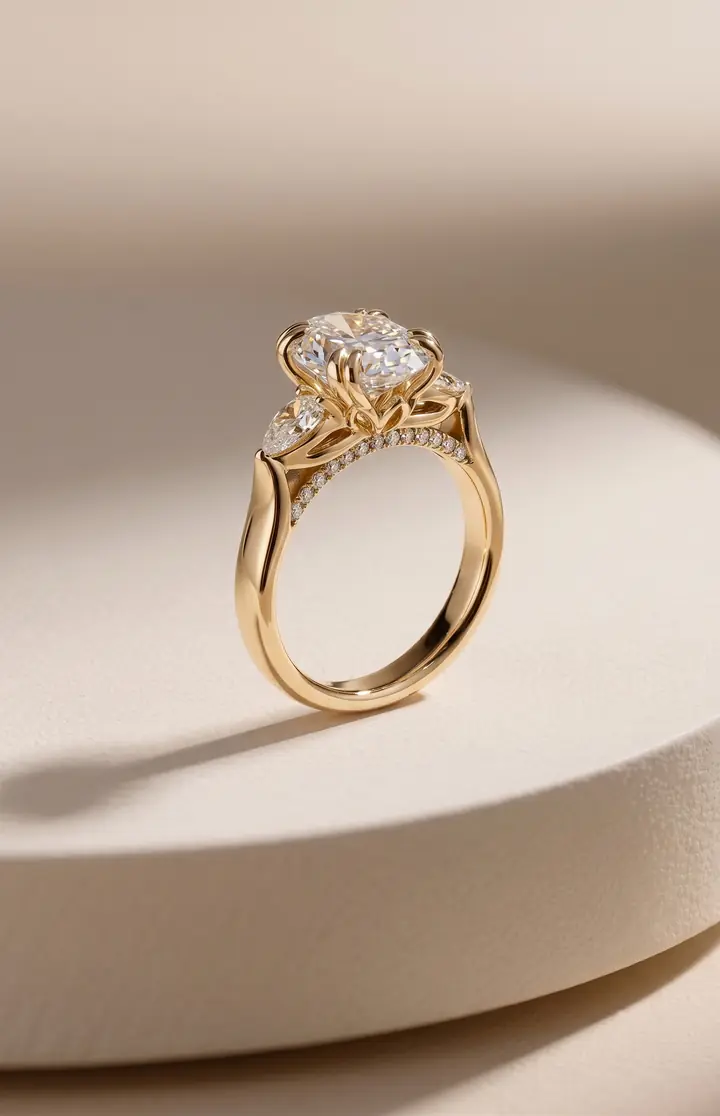
A prong setting uses narrow metal supports that rise around the stone and bend over its edge to hold it in place. Four and six prongs are common on round diamonds, but the right number and placement depend on the stone and design.
That open structure shows more of the stone and often makes the sides and underside easier to reach during cleaning. You give up some coverage, though. Edges and corners may sit closer to everyday knocks, and raised tips can catch on clothing, hair, or gloves.
In a four-prong vs. six-prong comparison, four prongs give a round stone a more open outline. Six add two holding points and can make the stone read a little rounder. The number alone does not decide which setting is better. Placement, workmanship, and condition matter more.
A bezel setting uses a metal rim that wraps around all or part of the stone’s girdle, which is the narrow edge between its top and bottom.
With more continuous coverage around the edge, the outline is usually smoother and has fewer exposed catch points. Still, a bezel is not impact-proof or maintenance-free. Oil and soap residue can collect where the rim meets the stone, and the extra metal changes how much of the stone you see.
A bezel changes the ring’s visual balance. A thicker rim can give the outline more weight, and bezel height and gallery design affect whether a straight wedding band sits where you expect.
A full bezel surrounds the stone’s entire perimeter, and a partial bezel leaves sections of the edge visible.
A full bezel gives continuous coverage around the girdle. A partial bezel opens the design and may improve cleaning access in uncovered areas, though those sections stay exposed. Compare the actual rim height and thickness instead of assuming every full or partial bezel wears the same way.
For daily wear, bezels usually create fewer catch points, and prongs expose more of the stone and give easier cleaning access.
Think about what your hands run into on an ordinary day. Gloves, pockets, tools, exercise equipment, cleaning, lifting, and hard surfaces all count. A low, smooth design may be easier to live with if you face frequent catch points. If visibility and cleaning access matter more, an open prong design may suit you, provided you’re comfortable checking it.
Do Amore’s guide to engagement rings for active lifestyles offers a useful routine-based checklist. Treat it as navigation for design and care questions, not as proof that any ring can handle every activity.
Bezels usually give the stone a smoother perimeter. Prongs create more projecting points and leave a larger share of the edge exposed.
Fewer catch points can help around knits, gloves, pockets, or hair. That is different from protection against a hard strike. CIBJO’s diamond reference explains that hardness means resistance to scratching, and toughness means resistance to breaking or chipping under impact. A diamond can resist scratches and still chip at a vulnerable edge.
Pointed and cornered shapes need extra thought because their tips may be more exposed. A full or partial bezel can cover selected areas, and V-shaped prongs wrap around points. The right answer depends on the actual stone, so no single rule works for every pear, marquise, heart, or princess cut.
Prongs need checks for wear, movement, or gaps, and bezels still need checks for visible damage or stone movement.
GIA notes that prongs can shift and loosen over time. If a stone moves, a prong looks bent, or a gap appears between metal and stone, stop wearing the ring and ask a jeweler to inspect it. The same caution applies after a hard impact, even when nothing looks wrong at first glance.
Prongs often give you more direct access around the stone during cleaning. With a bezel, residue can gather near the rim, but the gallery and underside of the ring make a big difference. Use care advice for the exact gemstone and metal, then follow a gentle engagement ring cleaning routine. A setting that looks sturdy is not a reason to reach for an aggressive cleaner.
Match the setting to the stone’s vulnerable areas, the amount of outline you want to see, and the way the metal supports each point or corner.
Stone shape alone does not tell the whole story. Two stones with the same outline can have different length-to-width ratios, corner angles, and girdle profiles. Those details affect how a bezel follows the edge and where prongs can sit without hiding too much or leaving a point exposed.
For round and oval stones, compare both setting families by perimeter visibility, smoothness, prong count, and side profile.
Four prongs keep more of a round stone’s outline open. Six spread the holding points around more of the perimeter and can make the shape read a little rounder. On an oval, the elongated outline makes prong placement and bezel thickness especially noticeable. Check how the ends are supported and whether the metal changes the shape you want to see.
Pear, marquise, heart, and princess cuts need deliberate support at their points or corners because those areas can be more vulnerable to chipping.
V-prongs can wrap around a pointed tip. A bezel may cover the entire perimeter or selected sections, depending on the design. Neither choice is automatically right for every stone. Ask how the exact stone’s vulnerable areas are supported, then inspect the top and side views.
Start with your routine, rank the tradeoffs that matter, and compare the actual ring from more than one angle. Photos can hide height and clearance, so use a top view for coverage and a side view for profile, exposed edges, and band spacing.
The top view shows how much of the perimeter is covered. Turn the ring sideways to see its height, gallery structure, exposed edges, and likely interaction with a wedding band.
Check where the metal touches the stone, whether points or corners are covered, and how far the prongs project. Then look at the intended wedding band. Will it sit as planned, or does it need a curved wedding band or another contoured shape? The category name cannot answer those design-specific questions.
Custom design becomes useful when standard product photos cannot show your exact stone dimensions, rim thickness, prong placement, side profile, or intended band pairing.
Do Amore’s custom ring process provides 3D renderings and a 1:1 digital model after the order is placed, then begins handcrafting after the buyer approves the renderings. That creates a design-specific checkpoint for reviewing coverage, proportions, profile, and likely band clearance before production.
Use that checkpoint to compare what you can see, without treating it as a guarantee. The rendering can clarify the tradeoffs in front of you. It cannot promise that the ring will never snag, prevent every chip, or make any wedding band sit flush.
The better setting is the finished design whose coverage, visibility, upkeep, shape support, and profile fit the way you plan to wear the ring.
Compare the bezel vs. prong tradeoffs on the actual stone. Look from the top and side, ask how vulnerable areas are supported, and choose the tradeoffs you can comfortably live with. That kind of close look is more reliable than treating either bezel or prong as universally better. If standard photos do not show coverage, profile, or wedding-band clearance clearly, share your preferred stone and band with Do Amore’s custom team. Their 3D renderings and 1:1 digital model give you an approval checkpoint before handcrafting, so you can choose the visible tradeoffs with more concrete information. Treat that review as a design tool, not a guarantee that the ring will never snag, chip, or require a contoured band.